-40%
DirecTV HD SL3S SWM Portable Satellite Dish for RV Kit
$ 52.27
- Description
- Size Guide
Description
Now shipping With the NEW 2020 HD4K 3D LNB!!Detailed Description
Now shipping with the NEW Slimline Gen 4 satellite dish! Much easier to assemble and set up than the Gen 1 Slimline dish. The name "Slimline" has been removed from the face and replaced with the AT&T logo and DIRECTV.
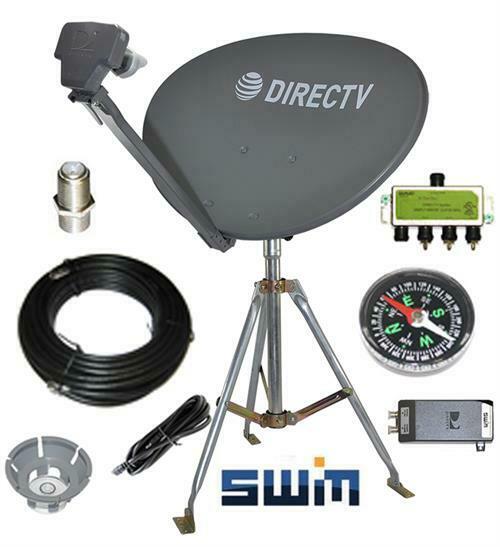
The Directv HD Satellite dish RV tripod kit from SatPro.tv is the perfect solution for taking your HD Directv satellite service with you on the road (RV Satellite, Camping). If HDTV is what you're after while traveling, this is the perfect kit. The kit comes with everything you need to get your DirecTV satellite TV service on the road. All you need is your satellite receiver, your TV, and 120V power and you'll be ready to watch TV.
Connect up to 4 receivers with supplied 4 Way Splitter.
Includes PI21 power inserter.
ATTENTION: This unit is compatible all SWM
Compatible
Directv receivers like
the H23,H24,H25,HR34 HR44 HR54+.
Simple Set Up.
Set up your Tripod and center mast Pole.
Aline the tripod with the level. (Mast must be perfectly level)
Build your Satellite Dish and install the Dish on the Tripod.
Adjust the satellite dish to the required compass heading and elevation. (Info provided on your satellite receiver under installation)
With your 50ft RG6 cable, Connect one end to the Satellite dish and the other end to the PI21 Power supply. (Out to SWM)
Please note the HR54 does not require the use of the supplied PI21 power supply.
From the PI21 power supply, connect the 3 Foot Rg6 coax jumper to the satellite receiver (Out to IRD)
Turn ON the Receiver go to the main menu Setup/ Repeat satellite dish setup.
The receiver will detect the SWM SL3 /SWM equipment.
Go to (Dish Pointer) tab enter zip code. Receiver will give you the Azimuth Compass heading (Direction) Elevation Marked on side of dish with a red or black line and the Tilt marked with a triangle pointing up.
Go to view signal strength tab and then go to (View Signal Meter)Tab.
The view signal meter screen will be your pointing aid.
Move the dish to set parameters from the (Dish Pointing) Tab above Azm,Elevation and Tilt.
You will have to sweep and do a grid pattern to find the satellite Plus + or minus - 5 degrees on the elevation and Azimuth.
When you go over the satellite a a colored box will appear with a percentage value from 0 to 100%
Try to get it past 90%.
Carefully tighten the bolts without moving the dish out of alignment.
Select the exit button on the remote control and the receiver will down load the program guide.
Ounce the program guide is downloaded you are ready to watch TV!
